


The field of Digital Products is one of the most powerful areas in e-commerce, but success hinges not merely on selling e-books or courses, but on building a professional, end-to-end automated ecosystem. This system must cleverly leverage free organic traffic and high-value products to ensure a continuous stream of sales with minimal effort.
This comprehensive article will reveal a precise, proven plan for launching a high-value digital products store. The strategy involves sourcing and rebranding these products to maximize their market appeal, and then automating the entire marketing and promotion process using advanced tools. This guarantees a relentless flow of sales with the least amount of time and effort.
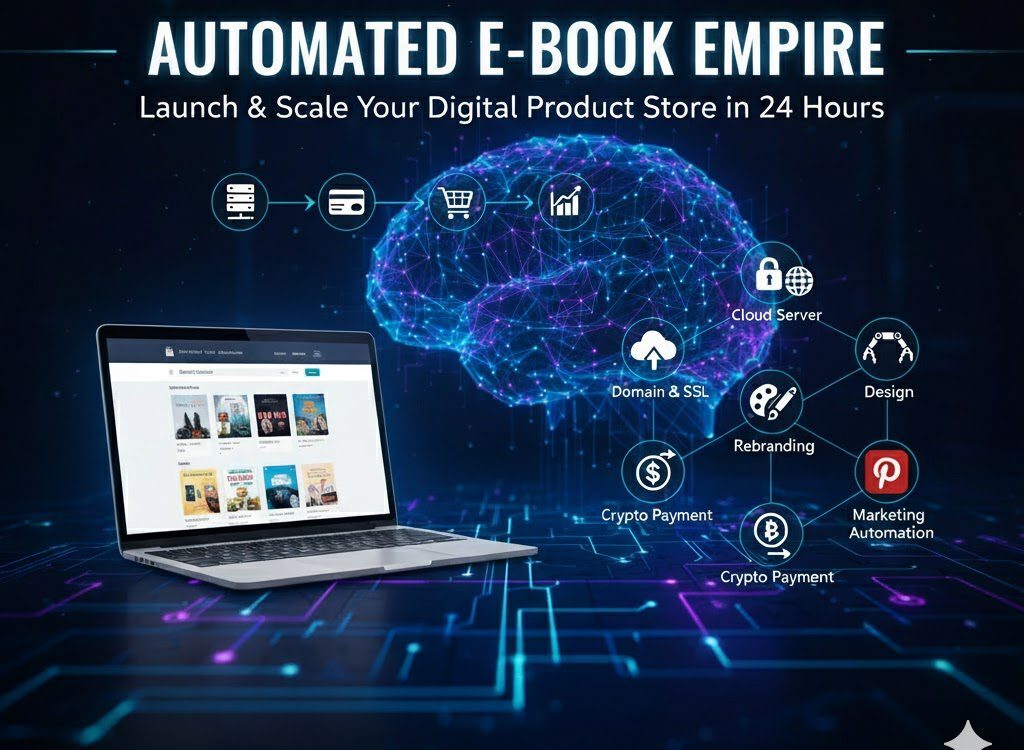
This strategy is built upon six key steps:
- Infrastructure and Website Setup: Choosing hosting, setting up a cloud server, and installing WordPress.
- Domain Name and SSL Certification: Connecting a professional domain to the server and ensuring security.
- Store Design and Customization: Selecting a theme and customizing the interface for professional product display.
- Product Preparation and Rebranding: Acquiring Private Label Rights (PLR) e-books and modifying them for uniqueness.
- Setting up a Cryptocurrency Payment Gateway: Activating a secure and censorship-resistant crypto payment system.
- Marketing Automation and Traffic Generation: Launching an automation campaign on Pinterest to guarantee targeted traffic.
🛠️ Part 1: Establishing a Robust Professional Infrastructure (Hosting & Server)
Launching a high-volume digital product store requires more than traditional shared hosting. To handle massive traffic, ensure high performance, and guarantee scalability, a Managed Cloud Server is essential.
1. Choosing Managed Cloud Hosting
To run a WordPress site with exceptional performance, we opt for Cloudways, a platform that provides managed cloud servers with great flexibility and speed.
The Signup Process:
Follow the registration process precisely, paying attention to these details:
- Enter your name, last name, and email address.
- Choose a strong password.
- Select your industry (e.g., E-Commerce) and expected monthly spend (e.g., \$0 to \$50 USD).
- Use a Promo Code: You can use a code like
PRO17to secure a significant discount on future paid hosting services.


The platform offers a three-day free trial without requiring credit card details, allowing you to fully test the setup before committing financially.
2. Launching the Cloud Server and Installing WordPress
After confirming your email and verifying the account via SMS, you can proceed with server launch:
- Select Application: Choose WordPress as the application to be installed on the server.
- Name the Project and Server:
- Project Name: Name it clearly (e.g., My Ebooks Project).
- Application Name: Choose a name for your WordPress application (e.g., MyStore WP).
- Select Cloud Provider: It’s best to keep the default option as DigitalOcean for its balance of performance and cost.
- Determine Server Resources (RAM): To minimize costs during the trial and avoid high bills after the three free days, you can reduce the RAM to 1GB initially. However, for optimal performance and to handle massive traffic, it is highly recommended to start with at least 2GB, or 5-10GB for a more comfortable working environment.
- Server Location: It is recommended to choose New York as the geographical location for global access and best performance.
The platform will take about seven minutes to deploy the server and install WordPress, making your site live instantly on a temporary domain.
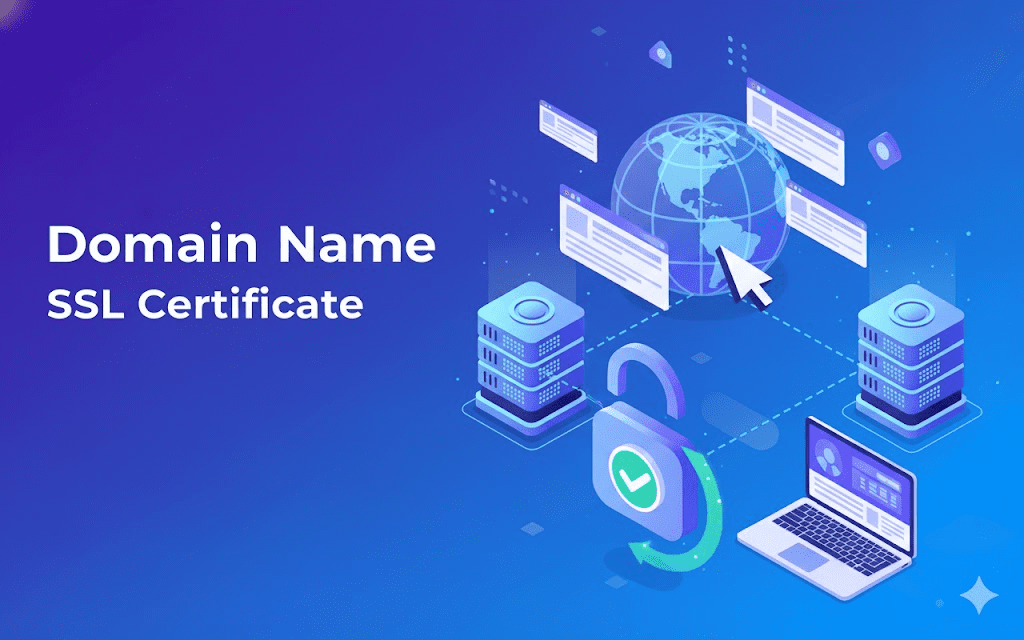
🔗 Part 2: Securing the Domain Name and SSL Certificate
The temporary domain provided by the hosting platform is impractical. The next step is to purchase a professional Domain Name and link it to the server to ensure credibility and easy access.
1. Choosing and Purchasing the Domain
To get a domain at competitive prices, use a reputable registrar like Namecheap [^1] or Name.com.
Searching for a Professional Name:
Instead of random searching, use a tool like Namelix [^2], an AI-powered service that generates available and professional domain names based on specific keywords (e.g., Digital Product or Ebook).
- Keyword: Enter, for example, “Digital Product”.
- Generation: Choose the automatic style and let the tool generate hundreds of options.
The Purchase:
Select the domain that suits you best (.com or .store domains are preferred), and complete the purchase process (which usually costs around \$10-\$12 USD annually), ensuring all contact details are accurately entered.
2. Linking the Domain to the Server (DNS Management)
To link the purchased domain (e.g., digistore.com) to the cloud server, you must modify the Advanced DNS records in the domain registrar’s control panel (e.g., Namecheap):
- Obtain the Public IP: Go to the Cloudways server control panel and copy the Public IP Address.
- Delete Default Records: In the Advanced DNS settings for your domain in Namecheap, delete any existing A Record or CNAME Record.
- Add A Record:
- Type: Select A Record.
- Host: Enter the @ symbol (to link the main domain).
- Value: Paste the Public IP you copied.
- Save.
- Add CNAME Record:
- Type: Select CNAME Record.
- Host: Enter www.
- Value: Enter your domain name (e.g.,
digistore.com) without the protocol (https://). - Save.
After these steps, return to Cloudways, go to Domain Management, add your new domain name, and then set it as the Primary Domain for the site.
3. Activating the Free SSL Certificate
To secure the website and ensure the green lock icon appears, you must activate an SSL certificate. Cloudways provides this for free via Let’s Encrypt:
- Go to SSL Certificate in the server control panel.
- Enter your email address and the new domain.
- Click Install Certificate.
The activation process may take a few minutes, after which your site will be secure and accessible via HTTPS.
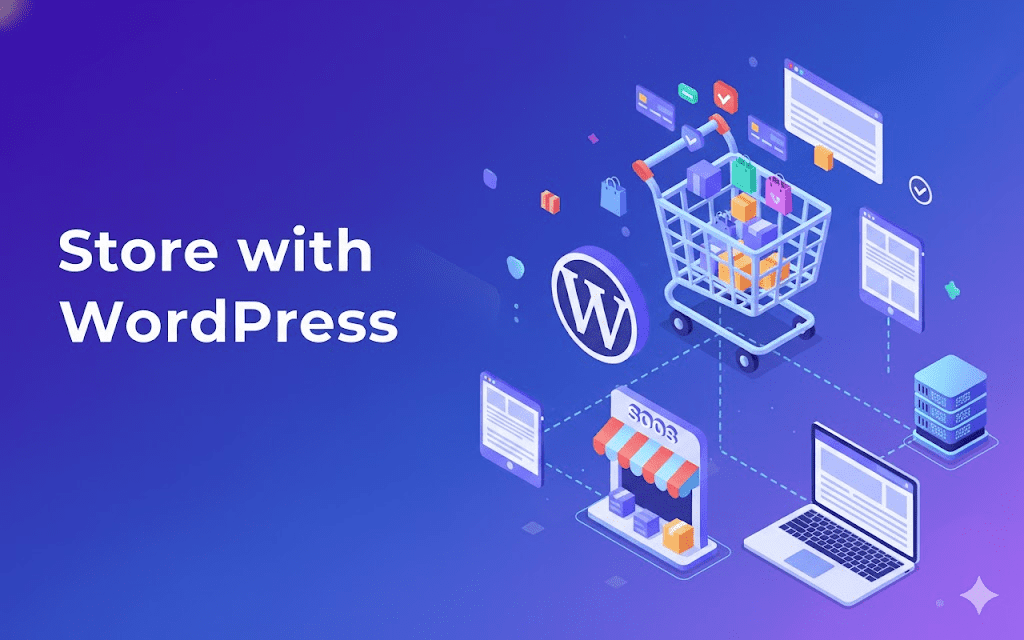
🎨 Part 3: Designing and Customizing the Store with WordPress
Now that the site is running on a professional domain, it’s time to set up the store’s front-end interface, relying on a popular WordPress theme for an attractive e-commerce design.
1. Installing the Theme and Importing the Template
After logging into the WordPress dashboard (using the access link provided in Cloudways), follow these steps:
- Basic Installation: Go to Appearance then Themes, and click Add New.
- Select Astra Theme: Search for the Astra theme, install, and activate it.
- Starter Templates Library: Go to Astra settings, find the Starter Templates option, install, and activate it.
- Choose Builder: Select Elementor as the page building tool.
- Filter Templates: Filter the templates by the E-Commerce category and choose the template closest to digital products. The Planet Store template is an excellent starting point.
- Import the Template: Select the template, ensuring you import the Full Site with all settings and pages.
2. Designing the Logo and Enhancing the Interface
To establish a professional look, a simple, attractive logo is necessary.
- Use Canva: Use the Canva [^3] tool to design a quick and professional logo. Choose a ready-made template and modify it to suit your store’s name.
- Remove Background: Use free online tools (like Remove.bg [^4]) to remove the logo’s background and make it transparent (PNG).
- Add Logo to Site: Upload the logo in the theme’s control panel and adjust its size for a perfect display in the Header and Footer.
- Choose Colors and Fonts: Select a consistent color palette (Color Palette) and fonts (Fonts) (e.g., blue and white) to reflect quality and professionalism.
3. Customizing Key Store Pages
After importing the template, the pages must be customized to fit digital products:
- Homepage: Use Elementor to modify text and images.
- Hero Section: Change the title to fit the digital products domain (e.g., “The Professional Digital Products Store”).
- Call to Action: Link the “Shop Now” button directly to the Shop Page.
- Add Social Proof: Add a section for Testimonials (even if they are initial ones) to build trust.
- About Us Page: Change the store’s mission and vision. You can use ChatGPT [^5] to write a professional Mission Statement.
- Contact Page: Add your dedicated contact details (a professional email address and a WhatsApp number).
📚 Part 4: Preparing and Professionally Rebranding Products
The store is ready, and the next step is to prepare the digital products (specifically e-books) for sale. The secret here is to use books with Private Label Rights (PLR) and modify them to avoid copyright issues and enhance their value.
1. Obtaining Private Label Rights (PLR) Products
There are specialized websites that offer e-books in broad fields (psychology, finance, technology, etc.) with PLR, either for free or a small fee, such as PLR.me ^6 (as an example).
- Search: Look for books in a targeted niche (e.g., Motivation) or your area of interest.
- Value: Choose books with “real value” written by credible authors.
2. The Rebranding Process to Avoid Copyright
To transform a PLR e-book into a unique product, the following modifications are necessary:
- File Conversion: If the book is in an uneditable format (like DOCX), use online tools (like CloudConvert [^7]) to convert it to PDF, or upload it to Google Docs.
- Cover Modification:
- Use Canva to search for “Book Cover” and design a new, attractive cover that fits the book’s content.
- Change the Title: You can slightly rephrase the title using AI, or just ensure the existing title looks professional.
- Maintain Author Name: To preserve the book’s credibility, it is essential to keep the original author’s name if they are reputable, and write it beneath the title (e.g., “By [Author Name]”).
- Rewriting the Introduction: Copy the original introduction and use ChatGPT to write a new, unique introduction, guiding the AI to maintain the same spirit and information but with unique wording. This step is crucial to ensure the final product is 100% unique.
- Final File Preparation: Download the newly modified e-book in its final PDF format from Canva.
3. Listing the Digital Product in WordPress (WooCommerce)
After completing the rebranding, we list the book in the store using the WooCommerce settings (automatically installed with the store template):
- Add New Product: Go to Products in the WordPress dashboard.
- Determine Product Type:
- Simple Product.
- Virtual: As the product is not physical.
- Downloadable: To allow the buyer to download it directly from your site.
- Enter Information:
- Product Name: Use the rephrased name. You can use ChatGPT to generate an SEO-Friendly product name.
- Long Description: Copy the enhanced long description from ChatGPT and place it in the main description.
- Short Product Description: Use it as an attractive summary.
- Pricing: Set a competitive price (e.g., \$4.99). You can add a “Regular Price” at a higher rate (e.g., \$6.99) to show a discount value.
- Downloadable File: Upload the final modified PDF file of the book.
- Product Image: Upload the new cover image designed in Canva.
- Category: Create a new category (e.g., Ebooks) and add the product to it.
Click Publish for the product to appear immediately on the store’s interface.
💳 Part 5: Setting up a Cryptocurrency Payment Gateway
To ensure instant, secure, and decentralized payment collection, and to avoid traditional bank fees or geographical blocking issues, we will set up a payment gateway that supports Cryptocurrency. This option is ideal for digital products due to its speed and resistance to censorship.
Note: You can always use traditional payment gateways like PayPal or Stripe, but crypto payment has become a powerful option in the digital e-commerce space.
1. Registration and Account Verification
We use a platform like Crypto.com Pay [^8] or Coinbase Commerce (as examples of platforms) that offer payment services to merchants:
- Registration: Sign up using your email and a strong password.
- Account Verification (KYC): You must verify your account as an individual (Personal) and then as a Business Merchant.
- This may require submitting identity documents (ID card or passport) and a selfie.
- This step is necessary for compliance with international standards and may take up to 24 hours.
2. Creating the Merchant and Obtaining the API Key
After verification, you can create the Merchant Profile:
- Create Merchant: In the platform’s control panel, create a new Merchant.
- Link Website: Enter your store’s domain name (e.g.,
https://digistore.com). - Obtain API Key: Go to the API Keys section and generate an API Key. You will also need the Merchant ID.
3. Linking the Payment Gateway to WordPress (WooCommerce)
To link the payment gateway to the store, a dedicated plugin must be installed:
- Install Code Plugin: Go to Plugins and search for a plugin to insert code (e.g., Code Snippets or Insert Headers and Footers).
- Install Payment Plugin: Go to the website of the payment platform (e.g., Crypto.com Pay) and download their specific WooCommerce Plugin in
.zipformat. - Installation and Activation: Upload the zipped file to WordPress, install, and activate the plugin.
- Settings: Go to WooCommerce > Settings > Payments.
- Activate Gateway: Enable the new payment gateway (e.g., Cryptomus Payment).
- Enter Keys: Enter the API Key and Merchant ID you copied from the payment platform’s control panel.

Once saved, visitors will be able to choose crypto payment (Bitcoin, Ethereum, USDT, TRX, etc.) at checkout.
🤖 Part 6: Automating Marketing and Generating Traffic
The most important step to guarantee continuous sales is launching a smart marketing automation system that ensures a relentless flow of targeted traffic at the lowest possible cost. This is achieved by leveraging powerful social media platforms like Pinterest.
1. Preparing the Database (Google Sheets)
To start the automation, a database must be created in Google Sheets to serve as the primary data source for the campaign:
- Sheet Name: Name it Ebook Automation.
- Essential Columns: Create the following columns:
Ebook NameDescription(The enhanced book description)Ebook Link(The product page link on your store)Image URL(Will be generated automatically later)Pin Status(To track the publishing status)
Fill this sheet with data for at least 10 to 20 different digital products.
2. Using the Automation Tool (Make/Integromat)
We rely on the Make ^9 tool (formerly Integromat) to manage the automation workflow.
Creating the Automation Scenario:
The scenario consists of a series of connected Modules/Nodes that perform the following:
- Google Sheets Module (Read):
- Goal: Read a row of unpublished data (
Pin Status: Pending) from theEbook Automationsheet. - Setup: Connect your Google account and select the specific Sheet.
- Goal: Read a row of unpublished data (
- AI Image Generation Module:
- Goal: Use the book’s name and description to generate a professional and attractive image suitable for a Pinterest Pin.
- Tool: You can use AI image generation tools like Midjourney or DALL-E (or paid API interfaces like Leonardo AI [^10] via HTTP requests) to generate high-quality images for a small cost.
- Pinterest Module (Publish):
- Goal: Automatically publish a new “Pin” to a dedicated Board.
- Setup:
- Connect your Pinterest account (ensure it is active and warmed up).
- Create a new Board on Pinterest (e.g., Ebook Deals).
- In the Module’s settings, link the fields:
Title(Ebook Name),Description(The enhanced description),Link(Ebook Link), andImage(The generated image URL).
- Google Sheets Module (Update):
- Goal: Update the
Pin Statusfield in the sheet toActiveto prevent republishing the same product.
- Goal: Update the
3. Activating Automation and Scaling Results
After connecting all modules and testing the scenario to ensure it works correctly (Run Once), you can fully activate the automation:
- Scheduling: Set the automation to run automatically every 60 minutes (or a suitable interval).
- Activation: Click Activate Scenario for the ecosystem to start working.
The Result:
This automated workflow will publish a new Pin every hour, featuring a professional image, an SEO-Optimized description, and a direct link to the book’s page on your store. This method targets visitors searching on Pinterest with high-value keywords, ensuring a massive, free flow of Targeted Traffic to the store with minimal manual intervention.
Conclusion: The Enduring Power of Automated Digital Systems
This comprehensive strategy proves that the digital product field remains one of the most powerful avenues for online income, especially when combined with the power of automation. The initial cost of setting up this ecosystem (domain cost, hosting fees, and minimal tool subscriptions) is negligible compared to the potential returns, far lower than traditional paid advertising budgets.
True success lies in building Automated Digital Assets that work on your behalf, from the product preparation phase (rebranding) to the marketing and sales generation phase. It is not about the volume of work, but the intelligence of the workflow. By following these steps, you can launch a professional, fully automated digital product store, primed to generate continuous sales without significant daily effort.