


The node-based automation platform n8n may appear complex upon first glance, but beneath its visual interface lies an intuitive and powerful system that is far simpler to master than one might assume. By focusing on the 80% of functionality you will actually utilize—specifically core node types and effective prompting—you can rapidly transition from beginner to building genuinely impactful digital solutions.
This extensive guide will walk you through the essential concepts and demonstrate their practical application by constructing three distinct levels of automation, culminating in a fully functional, highly customizable AI Personal Assistant. This agent can dynamically manage tasks like calendar entries, email summarization, and document processing, equipped with custom tools designed for your specific professional needs.
We will begin with a simple, foundational workflow, progress to a useful branching automation, and finally, construct the sophisticated AI agent. This hands-on, progressive approach ensures that you are learning by building something genuinely useful right away. Since a personal assistant is an application you interact with daily, n8n’s logic and interface will quickly become second nature, giving you the confidence to tackle more complex automations for your business, clients, or personal projects.
The Fundamental Distinction: Automations vs. Agents
For those new to the space, n8n has rapidly grown in popularity due to its flexibility in orchestrating complex processes. To utilize the platform effectively, it is crucial to understand the difference between the two core output types:
- Automations (Static and Rule-Based): These are fixed processes that follow a set sequence (A to B to C). Even if they incorporate filtering or branching logic, the execution path is always predefined by the developer.
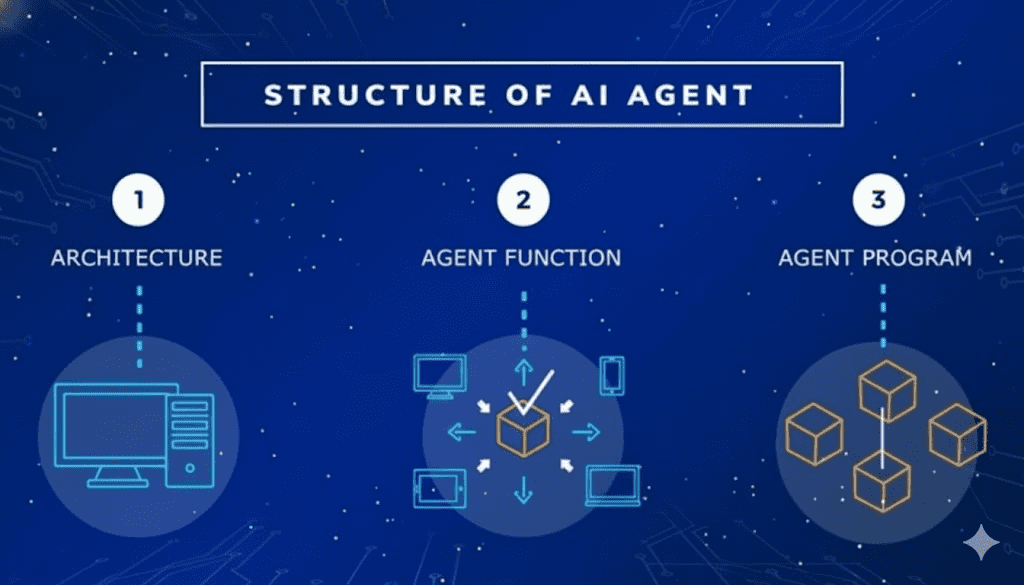
- Agents (Dynamic and Flexible): These are advanced systems capable of reasoning, making decisions, and choosing which actions (tools) to take based on the context of the input. They behave like digital employees that can interpret instructions and decide the optimal path to achieve a goal.
🎯 Unlocking the Potential: Practical Applications of n8n
The core strength of n8n is that it enables sophisticated functionality without requiring you to write code for every integration, making it accessible to a wide audience of builders and business owners. Its applications span:
- Personal Productivity: Building an assistant to handle your emails, schedule calendar events, and organize documents.
- Marketing and Business Operations: Automating social media content, managing CRM, and handling customer onboarding.
- E-commerce: Synchronizing product data and automating order processing.
- Data and Reporting: Pulling data from multiple sources, cleaning it, and automatically generating comprehensive reports.
- AI Integrations: Hooking up Large Language Models (LLMs) and custom APIs for text summarization, content creation, and running complex, multi-step AI agents.

🧱 Build 1: The Foundational Automation (Scheduled Weather Report)
This first build will be an automation that runs daily, checks the weather for a specific location, and then delivers the forecast via email.
Step 1: Initiating the Workflow with a Trigger
Every n8n workflow must begin with a Trigger Node, which defines the event that starts the sequence.
- New Workflow: Start a new, blank canvas (e.g., named Daily Weather Report).
- Add Trigger: Click the + button and select the Schedule Trigger node.
- Define Schedule: Configure the trigger interval to Days with one day between executions. Set the trigger time to a specific hour, for instance, 6 a.m.
Step 2: Retrieving External Data
The next node must connect to an external service to perform an action—in this case, fetching the weather.
- Select App: Search for and select the OpenWeather integration.
- Define Action: Choose the action Return current weather data.
- Set Up Credentials: Navigate to the OpenWeather site (https://openweathermap.org/), create an account, find the **API Keys**, and paste your key into the n8n node settings.
- Configure Parameters: Select the desired options (e.g., *Current Weather*), choose the unit system, and specify the location (e.g., by zip code).
Step 3: Delivering the Data via Email
The final step is to process the retrieved data and send the report.
- Add Output Node: Connect a Gmail node to the OpenWeather node. Select the action Send a message.
- Configure Gmail Credentials: Set up the credentials by clicking Sign in with Google.
- Compose the Message: Enter the recipient’s email and subject. Use the left-side input panel to find variables (e.g., *main.temp*, *name*). Click and drag the desired variable (e.g., *temp*) into the message field to embed **dynamic data fields**.
- Final Test: Click Test Workflow. The entire sequence will execute, and you will receive the dynamically generated weather email.
💾 Hosting and Deployment: Choosing Your n8n Environment
You have two primary options for running n8n:
- n8n Cloud: The easiest setup, provided by n8n itself.
- Self-Hosting (The Cost-Effective Choice): n8n is **source available**. The most accessible path is using a **Virtual Private Server (VPS)**.
Many providers offer one-click installation templates specifically for n8n, such as through a low-cost VPS plan. This method provides self-hosted control without the complex setup usually required for a local Docker installation.
📚 The n8n Toolkit: Core Node Categories
Effective automation relies on understanding the function of n8n’s core node types:
- Triggers: The starting point (e.g., *On a Schedule*, *From a Form Submission*, *Webhooks*).
- Actions (App Integrations): Pre-built connections for hundreds of apps (e.g., Google products, Notion, Stripe).
- HTTP Requests: The **universal adapter** that lets you connect to *any* public API.
- Logic Nodes: Control the flow and transformation of data, enabling *Filtering*, *Branching*, *Merging*, or *Looping*.
- AI Agent Node: The specialized node for building dynamic agents, connecting the LLM (the brain), a memory source, and a custom list of tools.


📨 Build 2: Advanced Automation with Logic and Data Management (Sponsorship Intake)
This build introduces form submission as a trigger, utilizes logic nodes for branching, and incorporates data management into a structured process.
Step 1: Form Trigger and Data Pinning
- Form Trigger: Add a **Form Submission** trigger node and define the form fields (e.g., *Company Name*, *Budget*).
- Test and Pin: Fill out the test form and click the **Pin** button above the output data. This saves the test data, allowing you to run and test downstream nodes without repeated submissions.
Step 2: Routing Logic with the Switch Node
The **Switch Node** is a primary logic component, allowing the workflow to branch into different execution paths based on a condition.
- Add Logic Node: Connect a **Switch Node** (found under *Flow*) to the form trigger.
- Define Rules: We will route based on the *Budget* field.
- Low Budget Path: Set the rule to `is less than` a threshold (e.g.,
1000000). - High Budget Path: Set the rule to `is greater than or equal to` the same threshold.
- Low Budget Path: Set the rule to `is less than` a threshold (e.g.,
Step 3: Tailored Email Response (High/Low Budget)
We will add a separate Gmail node to each branch, ensuring the response is contextually appropriate.
- Low Budget Response: Add a **Gmail** node to the ‘less than $1M’ path. Use **dynamic data** to personalize the decline message.
- High Budget Response: **Duplicate** the Gmail node and connect it to the ‘greater than or equal to $1M’ path. Edit the message to be a positive, follow-up-oriented response.
Step 4: Data Logging with Google Sheets
Data logging is essential for tracking and follow-up, and the same logic applies to AirTable, HubSpot, or Notion.
- Add Data Node: Add a **Google Sheets** node to the *Low Budget* branch. Select the action *Append Row*.
- Setup Spreadsheet: Create a new Google Sheet with columns matching your form fields, plus an *Action Taken* column.
- Connect and Map: Paste the Sheet’s URL. **Map Data** by dragging the dynamic data fields from the input onto the respective column fields. For the *Action Taken* column, simply type the static word **”Decline”**.
- Duplicate and Update: Duplicate the Google Sheets node and connect it to the *High Budget* path, changing the static *Action Taken* to **”Follow-up Sent”**.
Expanding the Workflow: Common Patterns
Common patterns to add include:
- Enriching the Lead: Adding an AI Agent node to research the company’s website or LinkedIn profile for a *Qualification Report*.
- Merge Nodes: Combining data from multiple external sources (e.g., the original form *and* a company research tool) into a single, cohesive output.
- Set Node (Data Cleaning): Using a **Set Node** to strip out unwanted symbols (like ‘$’) or reformat data before it reaches a logic step.
👽 The Deep Dive: JSON and Dynamic Data
A foundational understanding of **JSON (JavaScript Object Notation)** is helpful, as it is the format data moves between n8n nodes. It is simply a structured way to organize information in text.
- Reading JSON in n8n: When you drag a field like *Budget* into a node, n8n generates an expression like
${{ $json.budget }}. The$jsonrefers to the data from the previous node, and.budgetis the specific field name. - Cross-Workflow Referencing: In the Google Sheets example, data came from an earlier node, requiring an expression like
${{ $node["On Form Submission"].json["company name"] }}.
While n8n handles the writing, knowing the structure helps you read it, troubleshoot errors, and ask an LLM to generate more complex expressions (e.g., for rounding numbers or stripping out characters).
🤖 Build 3: The Dynamic AI Personal Assistant
The final build leverages the **AI Agent Node** to create a digital employee that can reason, plan, and execute tasks based on complex natural language inputs.
Step 1: Agent Node Setup
- Trigger: Start the workflow with a **Chat Trigger** node for real-time interaction.
- AI Agent Node: Add the **AI Agent Node**.
- Brain Configuration: Select your preferred LLM (e.g., OpenAI). You will need to create and enter a new **API Key** from the provider’s platform (e.g., platform.openai.com/api-keys).
- Memory: Set up a simple memory (e.g.,
Simple Memory) to maintain conversation context.
Step 2: Adding the System Prompt
The **System Prompt** provides the agent with its identity, goals, and rules of engagement, controlling its behavior.
- Define Role and Rules: In the Agent Node settings, use the Add Options > System Message field.
- Prompt Components: Include the agent’s role (e.g., “personal assistant”), its goals, a list of all tools it can use, and clear rules for when to use those tools.
Step 3: Connecting Core Tools (Sub-Workflows)
The most efficient and scalable approach is to have the main agent orchestrate the actions of specialized, single-purpose sub-workflows.
- Create Tool Sub-Workflows: Build separate workflows for each core tool (e.g., a *Calendar Agent* workflow). The trigger for these sub-workflows is **When executed by another workflow**.
- Connect to Main Agent: In the main AI Agent Node, add a **Call n8n Workflow** tool. Select the specialized sub-workflow (e.g., the *Calendar Agent*) from the list.
- Natural Language Input: Configure the input fields to **Define automatically by the model**. This allows the LLM to process the user’s natural language request and correctly map the details to the sub-workflow’s input fields.
Step 4: Adding Custom and Advanced Tools
You can connect specialized tools using the same *Call n8n Workflow* method.
- Reddit Curator: A sub-workflow that scrapes and merges data from subreddits, feeding it to an LLM for summarization.
- YouTube Summarizer: A sub-workflow that analyzes sentiment and extracts critiques from video comments.
- External API Tool: A sub-workflow using an **HTTP Request Node** to connect to any external service (e.g., a custom video creator or another data source).
By connecting these sub-workflows, the main agent gains the power to plan and execute multi-step processes, transforming it into a truly indispensable digital employee.
💡 Conclusion: The Path Forward in Automation
n8n offers an unparalleled canvas for the creation of sophisticated, AI-powered workflows and agents. By mastering the core concepts—the distinction between fixed automations and dynamic agents, the role of trigger and logic nodes, and the power of orchestrating sub-workflows—you gain the ability to build custom digital solutions that can dramatically enhance personal and business efficiency.
Errors are a certainty in any automation journey; they are simply opportunities for iteration. The key is to leverage the platform’s community and the generative power of LLMs as your build partner. The scope of what is possible, from simple data cleaning to complex Retrieval Augmented Generation (RAG) systems using vector databases for deep knowledge retrieval, opens up limitless potential for solo builders and businesses.